In preparation for Spain, with the predicted kilometers to be driven, Glen needs an upgrade: Cruise Control on Ducato 244.
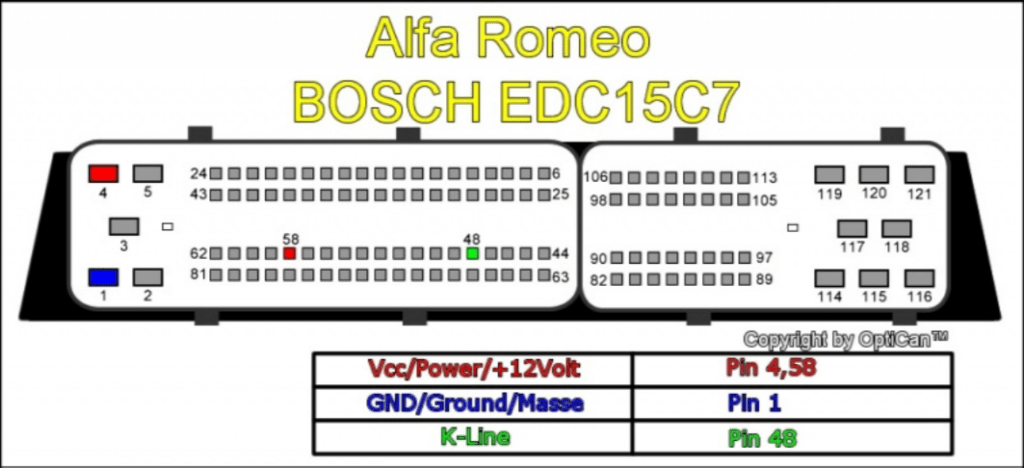
To add to this, the Fiat Ducato 244 (Bosch EDC15C7) control panel is already set up for Cruise Control, but in Glen’s case, it lacks the connections that arrive inside the cabin.
To make the upgrade: Cruise Control on Ducato 244, we need:
- Cruise control lever for Alfa Romeo 147
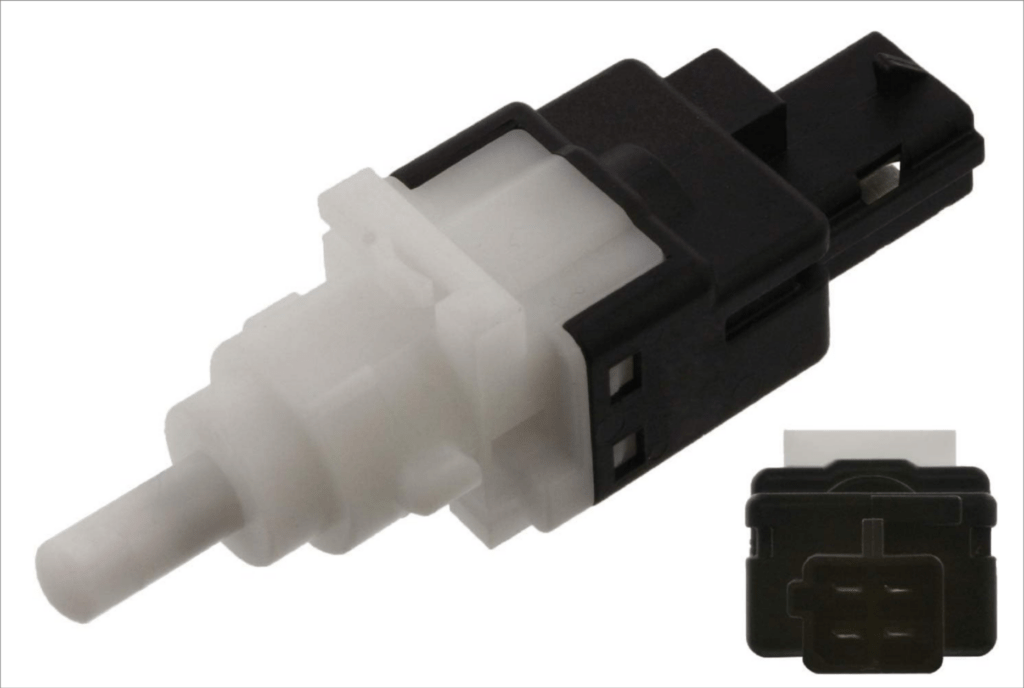
- Four-pole brake light switch for Fiat Panda
- Flexible 6-core cable
- LED light
Upgrade Cruise Control on Ducato 244: Tasks
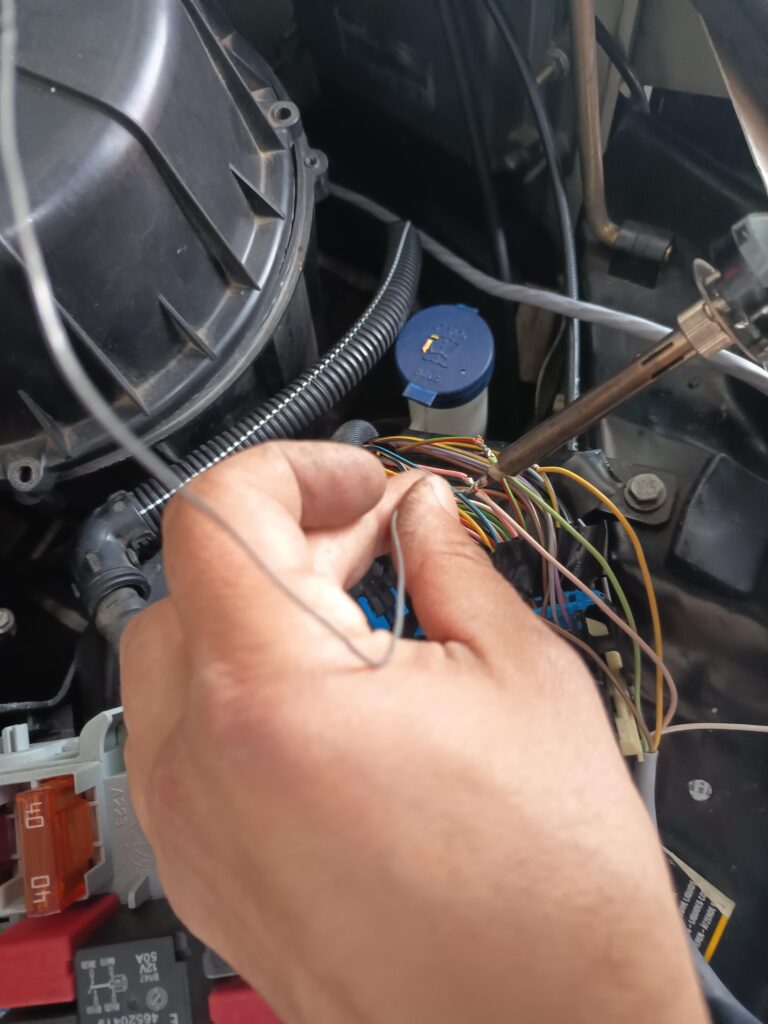
Step 1: Connect the cables from the control panel to the cabin
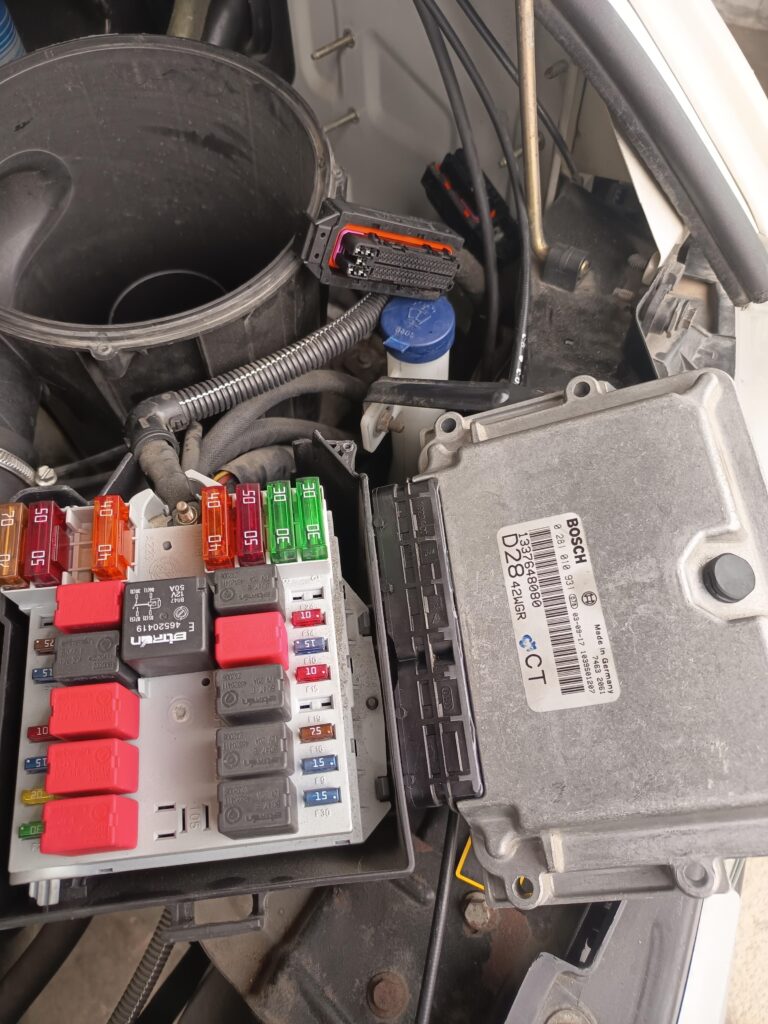
From the Bosch control panel, looking straight into the engine compartment, on the right-hand side, you need to identify the following pins:
- 23: Cruise Control dashboard light (usually already connected)
- 61: Clutch lever (usually already connected)
- 53: Common set
- 54: Brake pedal lever
- 55: Reset
- 56: Set –
- 57: Set +
These cables go to the CVM dashboard control panel on a blue-colored connector and interrupt here. Therefore, we need to cut the power from the connector and use a six-pole cable (I preferred soldering the wires for a stronger hold and safety) and bring them into the cabin. In addition to cutting the power, we also need to remove all the plastic trim on the driver’s side: it’s a relatively simple operation, as there are only a few screws to deal with, some of which are conveniently hidden behind various components such as the lever of opening the engine compartment, the adjustment lever of the steering wheel, and the storage box behind the glove compartment on the right.
NOTE: Please perform all operations with the negative battery cable disconnected
We will color-code them because it will be useful later.
| PIN | CONTROL PANEL COLOR | CABLE COLOR |
|---|---|---|
| 23 | pink – white | white |
| 53 | black – violet | gray |
| 54 | violet – gray | brown |
| 55 | pink – yellow | pink |
| 56 | black – yellow | yellow |
| 57 | green – red | green |
NOTE: The colors coming from the control panel might be different.
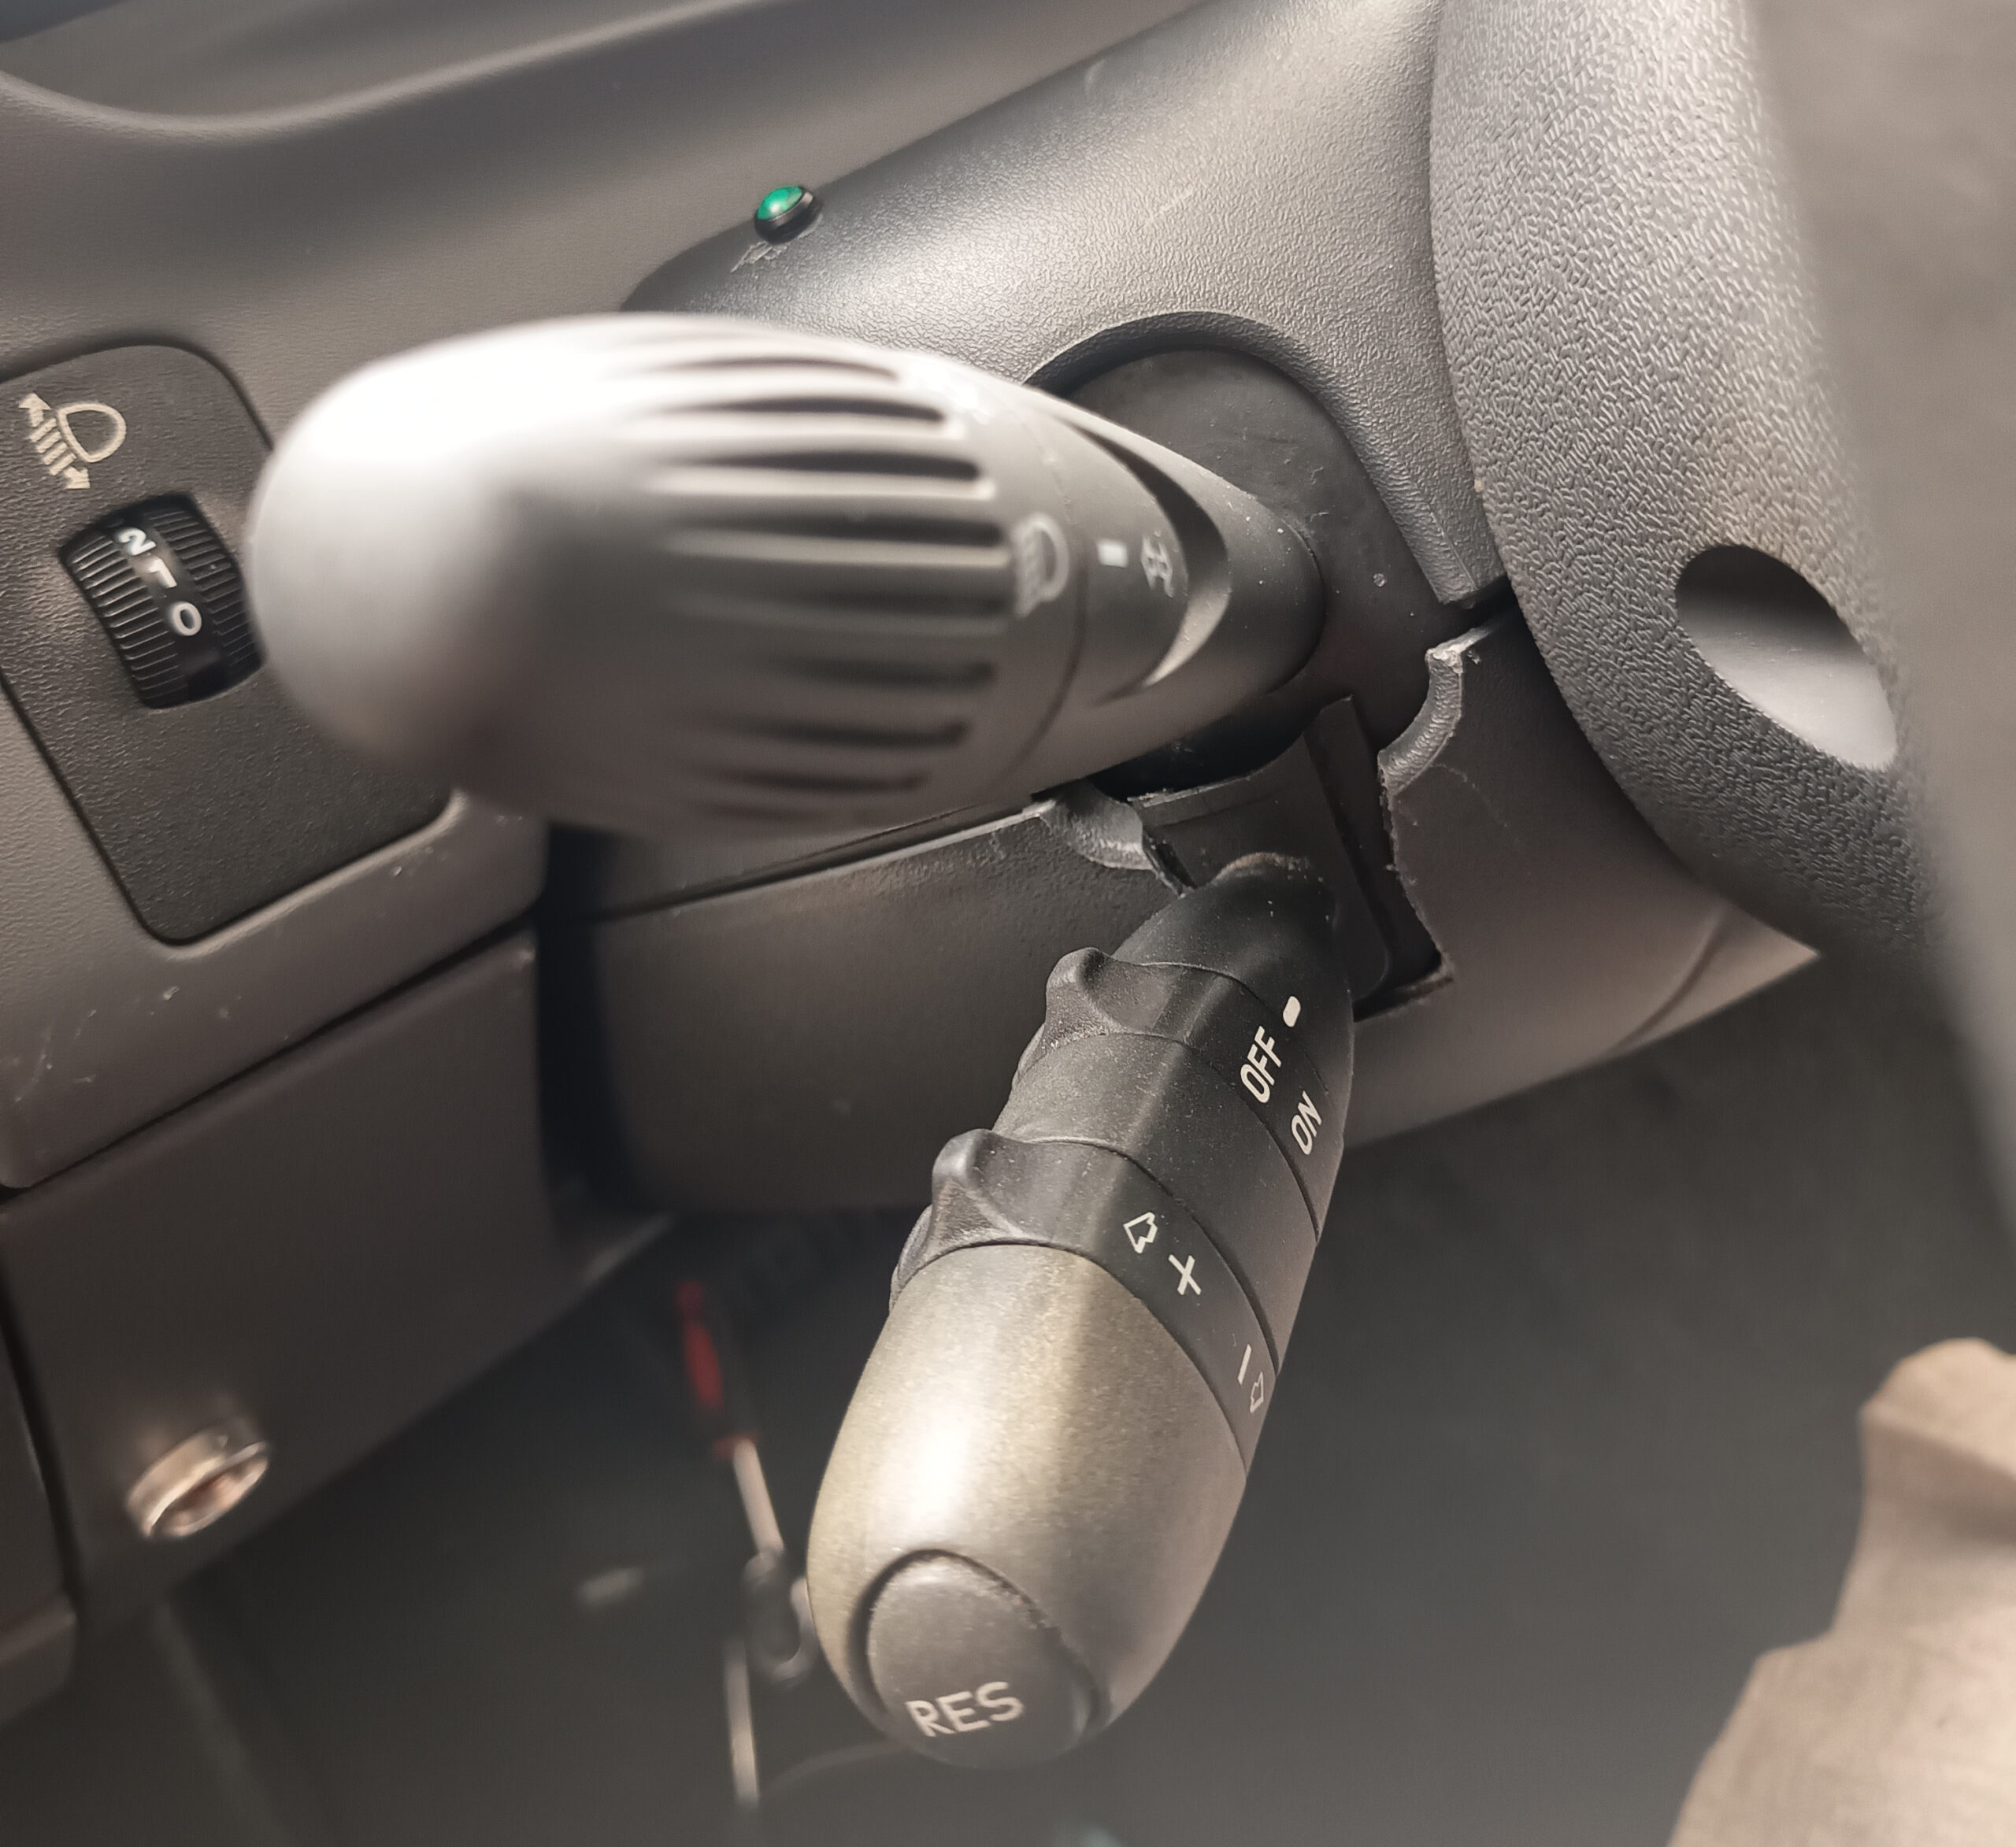
Step 2: Connect the Cruise Control lever
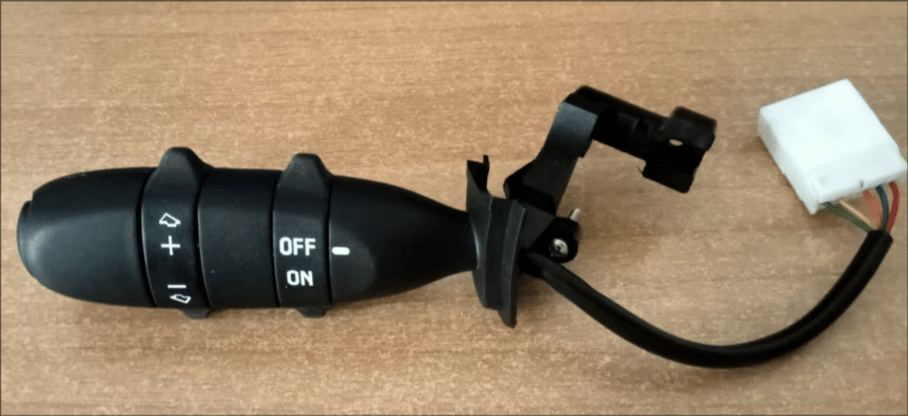
The Cruise Control lever is secured through an attached clip under the steering wheel indicator lever with a screw.
I’ve added extra security by using a 4-pole connector.
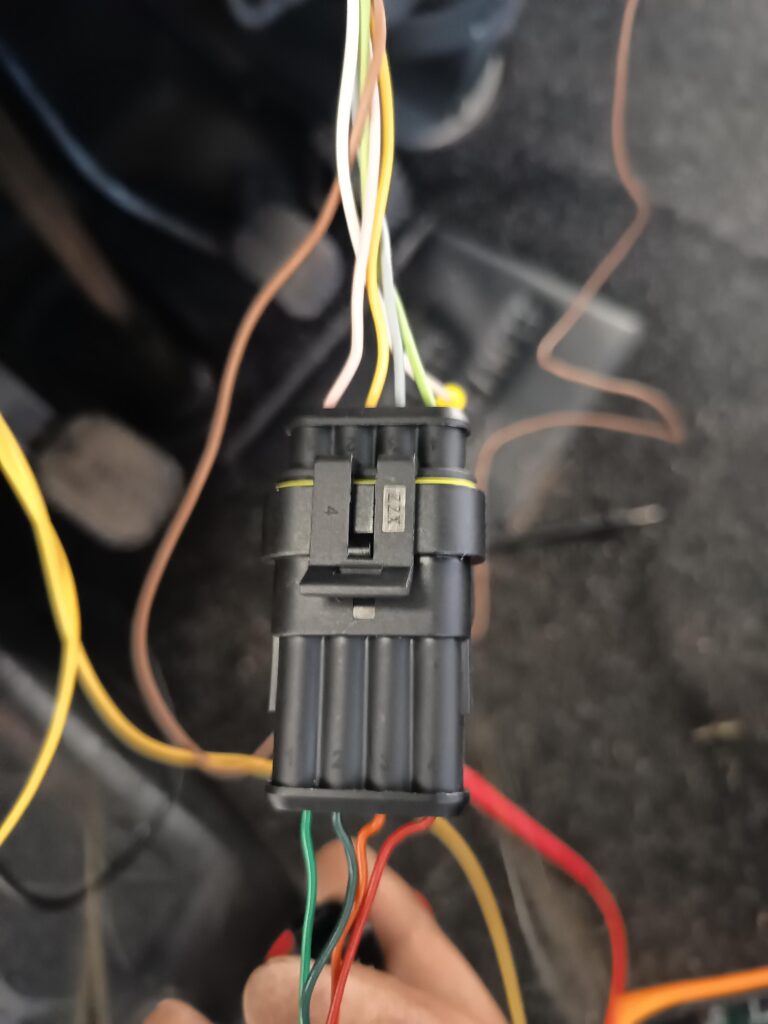
The connections are as follows:
| CABLE COLOR | LEVER COLOR |
|---|---|
| grey | orange |
| yellow | blue |
| pink | green |
| green | red |
The yellow wire of the lever is the power supply wire. Let’s see how we connect it in the next step.
Step 3: Connect the Brake Switch
The original brake switch has four wires, but only two are actually connected. That’s why you need to purchase a new four-pole switch.
Here is a summary of the wire colors and connections
| PIN | COLOR | CONNECTION |
|---|---|---|
| 1 | gray – black | control panel PIN 54 |
| 2 | red – black | |
| 3 | blue | yellow cable CC lever |
| 4 | blue – green | fuse 26 |
It is necessary to solder a jumper between pins 3 and 4 to secure the connection of the Cruise Control under fuse. Of course, this will be soldered to make the connections even more secure and stable.
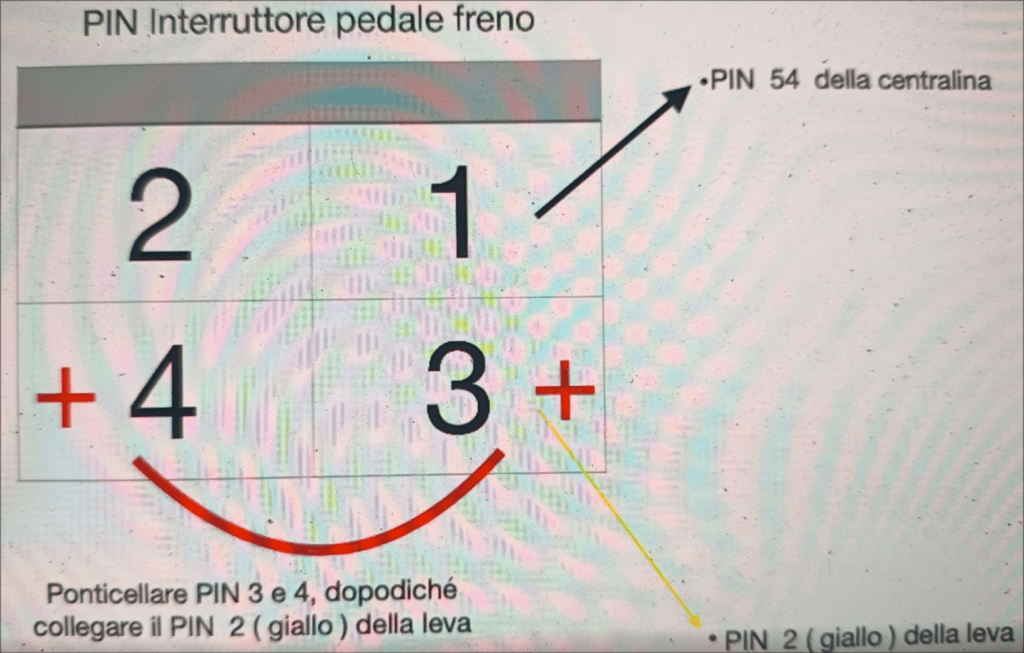
NOTE: The pin 1 of the brake lever switch (gray-black wire) may still be disconnected. Connect the wire we brought inside the cabin to this pin.
Step 4: Connect the dashboard light
Unfortunately, the command panel of Glen does not have a predisposition for the Cruise Control LED. There is an icon but no LED on the schedule.
I decided then to install a small green LED to signal the activation of the Cruise Control.
The Pin 23 of the control panel (pink-white) is a negative signal and was brought inside the cabin with a white wire.
We take a positive from the existing system and connect both to the LED.
We practice a hole in the plastic rear of the steering wheel and the game is over!
Upgrading Cruise Control on Ducato 244: Road Testing and Verification
To ensure that the upgrade of the Cruise Control on Ducato 244 functions correctly before undergoing a final road test, it is recommended to have a tester verify the following connections:
- When accessing the “common set” of the brake lever, the circuit should have 12V.
- At all times when accessing the brake lever commands, they should indicate 12V when activated through the connection to the control panel van motor CVM
- It is necessary to verify that when the commands are activated, signals arrive at the connector of the dashboard light
- Verify that the brown wire PIN 54 is continuous with the gray-black wire PIN 1 of the brake lever switch
- Once the panel lights up, the LED should turn on and off for the check of the system
- When activating the Cruise Control, the LED should also turn on
Once the state of the connections has been verified, it’s possible to proceed with the final test on the road: Beyond 40 km/h, activate the Cruise Control using the specific lever ON/OFF (the LED will light up) and subsequently set the speed through the command SET+. Releasing the accelerator pedal, the camper will maintain a constant speed at the set value. Test now by using the command SET+ to increase the speed and SET- to decrease it. Using the brake or clutch, the Cruise Control will disengage remaining in “standby” (the LED always stays on). To re-activate the Cruise Control, press the RES button. Finally, deactivate the Cruise Control.
Upgrading Cruise Control on Ducato 244: Conclusion
Finally now that Glen is ready to take on the 3000 km journey through Spain, installing the upgrade Cruise Control on Ducato 244 requires a bit of courage and some manual skills. In fact, it’s worth noting that this project can be quite challenging. However, with the right guidance, it can also be very rewarding. On top of that, we get to enjoy not only greater comfort while driving long distances, but also improved fuel efficiency.
Stay tuned! or better, “no te despegues”
Leave a Reply